Remote Controller
Follow this step-by-step guide to use your remote controller. While some steps are universal across products, others may vary depending on your specific model. Use the tabs to select the guide tailored to your product. General information about the remote controller can be found here.
Head back to your Product page and start with the initial steps outlined there. They’ll point you to the correct tutorial for your specific drone.
Your drone may have custom instructions available. If so, they can be found under the 4. Custom Instructions chapter on the Product Page.
- Radiomaster TX16
- SIYI MK32
- RoboFly Jumper
The remote controller (RC) provided with the drone can be turned on by holding the designated power button in the center of the RC. When the drone is powered on, the RC will automatically connect during the first minute of operation. To power off the RC, press and hold the same button.
When turning on the RC, ensure all switches are in the default position (pushed away from you).
The RC sticks are configured based on the mode specified in your order. Some switches are also configured and serve different purposes.
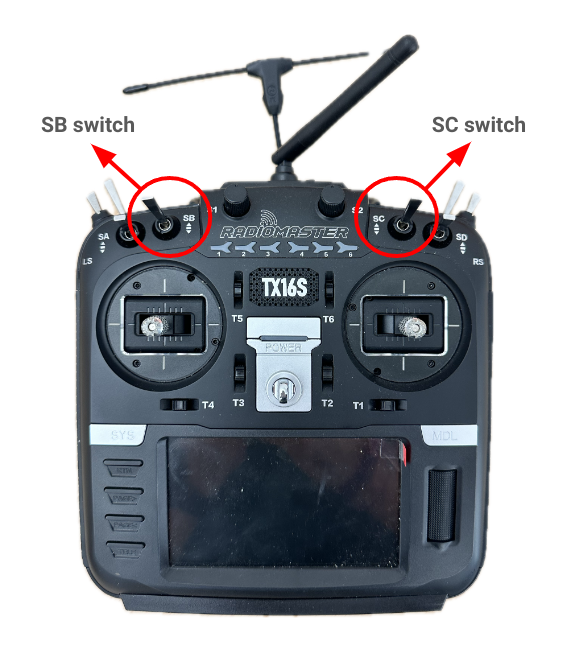
SC (Flight Mode Switch)
This 3-position switch selects among three flight modes. More information can be found here:
- Manual Mode (up): Default mode for manual flight without GPS. The vehicle hovers when no control input is applied but moves with current momentum and drifts due to potential perturbations.
- Altitude Mode (middle): Easiest manual mode without GPS. Altitude is maintained, but horizontal movement is subject to momentum and wind.
- Position Mode (down): Requires active GPS. This is the safest manual mode. The vehicle maintains its position in all directions when no control input is applied, even against wind.
SB (Offboard Switch)
The SB is a 3-position switch, with the middle position unassigned. Switching to the lower position (closest to you) activates Offboard Mode. In this mode, the drone follows any deployed autonomous session, and stick movements will have no effect. Switching out of Offboard Mode during flight halts autonomous control. Returning to Offboard Mode has no effect unless autonomous commands are resent.
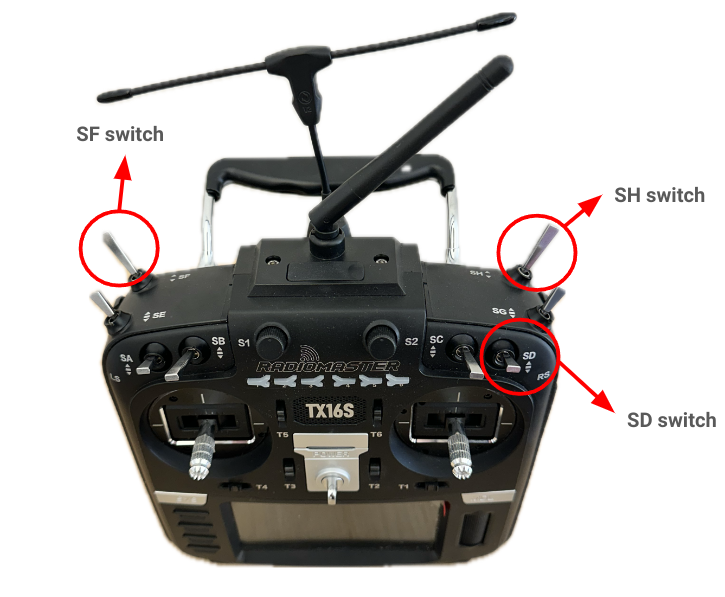
SD (Take-over Switch)
The SD is a 3-position switch, with the middle position unassigned. It allows the pilot to temporarily override autonomous sessions to avoid hazards. Flipping it down (closest to you) during flight takes over manual control. Returning to the up position resumes halted sessions.
SH (Escalating Emergency Switch)
This 2-position switch is used for safety actions during emergencies in autonomous flight. Toggle it once and this will start the emergency hover (ehover) procedure forcing the drone to hover in its current position. Toggle it a second time and it will start the emergency landing (eland) procedure forcing the drone to land using a feedback control. Toggle it a third time and the drone will enter the failsafe procedure forcing it to land using only the IMU. This landing motion is faster but may result in horizontal drifts and aggressive landing.
Once the SH switch has been toggled, there is no way to go back to the autonomous state. It is an emergency procedure that should be carefully used. The SD switch cannot be used once the SH switch has been toggled. However, if you engaged the ehover procedure but cannot land safely because of the environment or any other reason, you can still go back to Manual mode using the SB switch and control the drone manually.
Arming and Disarming the Drone
Arming prepares the drone for flight. This involves a gesture with one or both sticks, performed for one second. The arming gesture can differ depending on your requirements (see the official website).
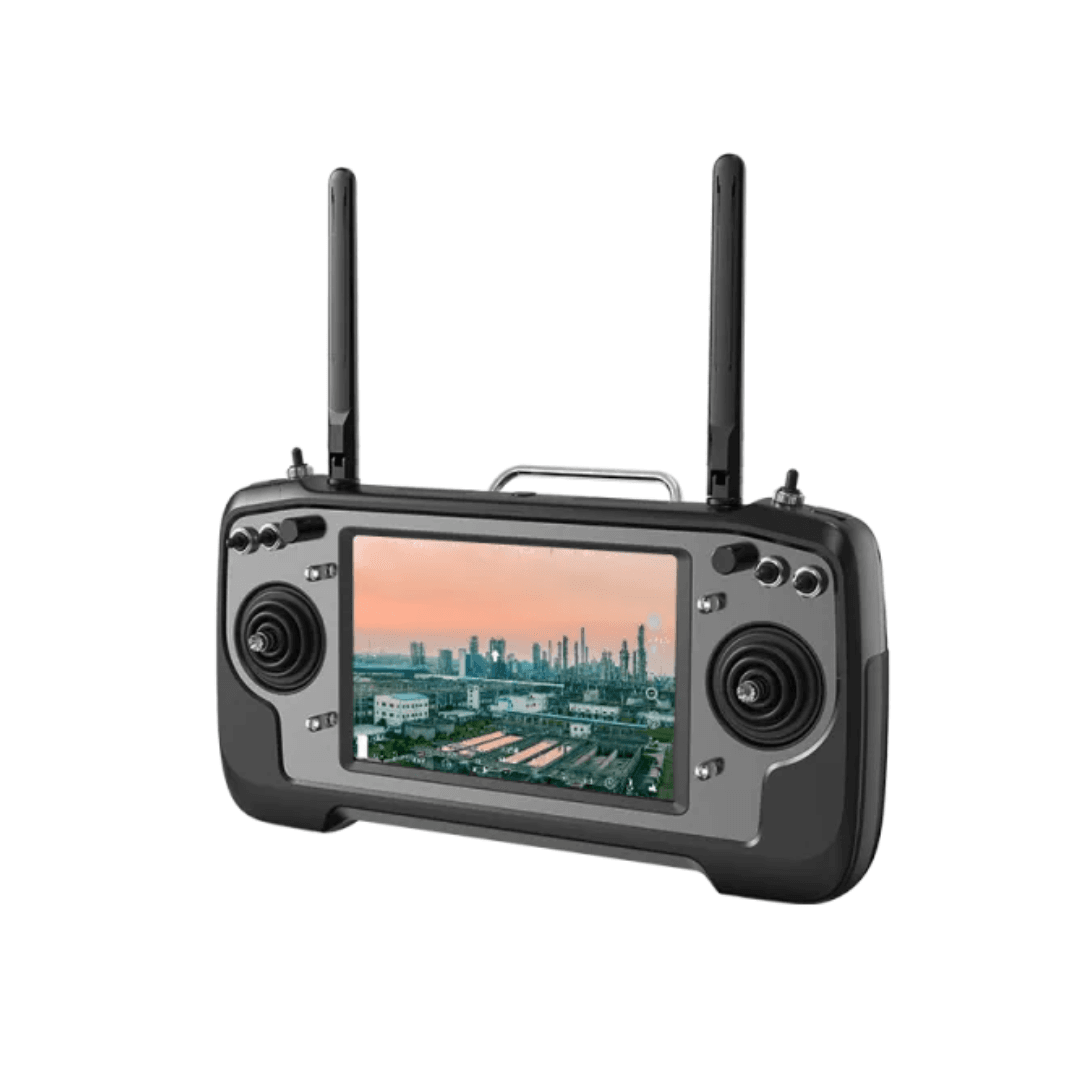
The remote controller (RC) provided with the drone can be turned on by holding the designated power button at the top of the RC. When the drone is powered on, the RC will automatically connect during the first minute of operation. To power off the RC, press and hold the same button.
When turning on the RC, ensure all switches are in the default position (pushed away from you).
The RC sticks are configured based on the mode specified in your order. Some switches are also configured and serve different purposes.
SC (Flight Mode Switch)
This 3-position switch selects among three flight modes. More information can be found here:
- Manual Mode (up): Default mode for manual flight without GPS. The vehicle hovers when no control input is applied but moves with current momentum and drifts due to potential perturbations.
- Altitude Mode (middle): Easiest manual mode without GPS. Altitude is maintained, but horizontal movement is subject to momentum and wind.
- Position Mode (down): Requires active GPS. This is the safest manual mode. The vehicle maintains its position in all directions when no control input is applied, even against wind.
SB (Offboard Switch)
The SB is a 3-position switch, with the middle position unassigned. Switching to the lower position (closest to you) activates Offboard Mode. In this mode, the drone follows any deployed autonomous session, and stick movements will have no effect. Switching out of Offboard Mode during flight halts autonomous control. Returning to Offboard Mode has no effect unless autonomous commands are resent.
SD (Take-over Switch)
The SD is a 3-position switch, with the middle position unassigned. It allows the pilot to temporarily override autonomous sessions to avoid hazards. Flipping it down (closest to you) during flight takes over manual control. Returning to the up position resumes halted sessions.
SF (Escalating Emergency Switch)
This 2-position switch is used for safety actions during emergencies in autonomous flight. Toggle it once and this will start the emergency hover (ehover) procedure forcing the drone to hover in its current position. Toggle it a second time and it will start the emergency landing (eland) procedure forcing the drone to land using a feedback control. Toggle it a third time and the drone will enter the failsafe procedure forcing it to land using only the IMU. This landing motion is faster but may result in horizontal drifts and aggressive landing.
Once the SF switch has been toggled, there is no way to go back to the autonomous state. It is an emergency procedure that should be carefully used. The SD switch cannot be used once the SF switch has been toggled. However, if you engaged the ehover procedure but cannot land safely because of the environment or any other reason, you can still go back to Manual mode using the SB switch and control the drone manually.
Arming and Disarming the Drone
Arming prepares the drone for flight. This involves a gesture with one or both sticks, performed for one second. The arming gesture can differ depending on your requirements (see the official website).
The remote controller (RC) provided with RoboFly can be turned on by holding the large black button in the center. When RoboFly is powered on, there is a one-minute window during which the RC will automatically connect. After this period, RoboFly will ignore the RC for safety reasons. To power off the RC, press and hold the same button.
When turning on the RC, ensure all switches are in the default position (down and away from you). Position the throttle fully downward as well; the RC will provide a warning if this is not set.
The RC sticks are configured based on the mode specified in your order (see official documentation). Stick behavior varies depending on the flight mode, controlled via four switches: SWA, SWB, SWC, and SWD. Familiarize yourself with their functions.
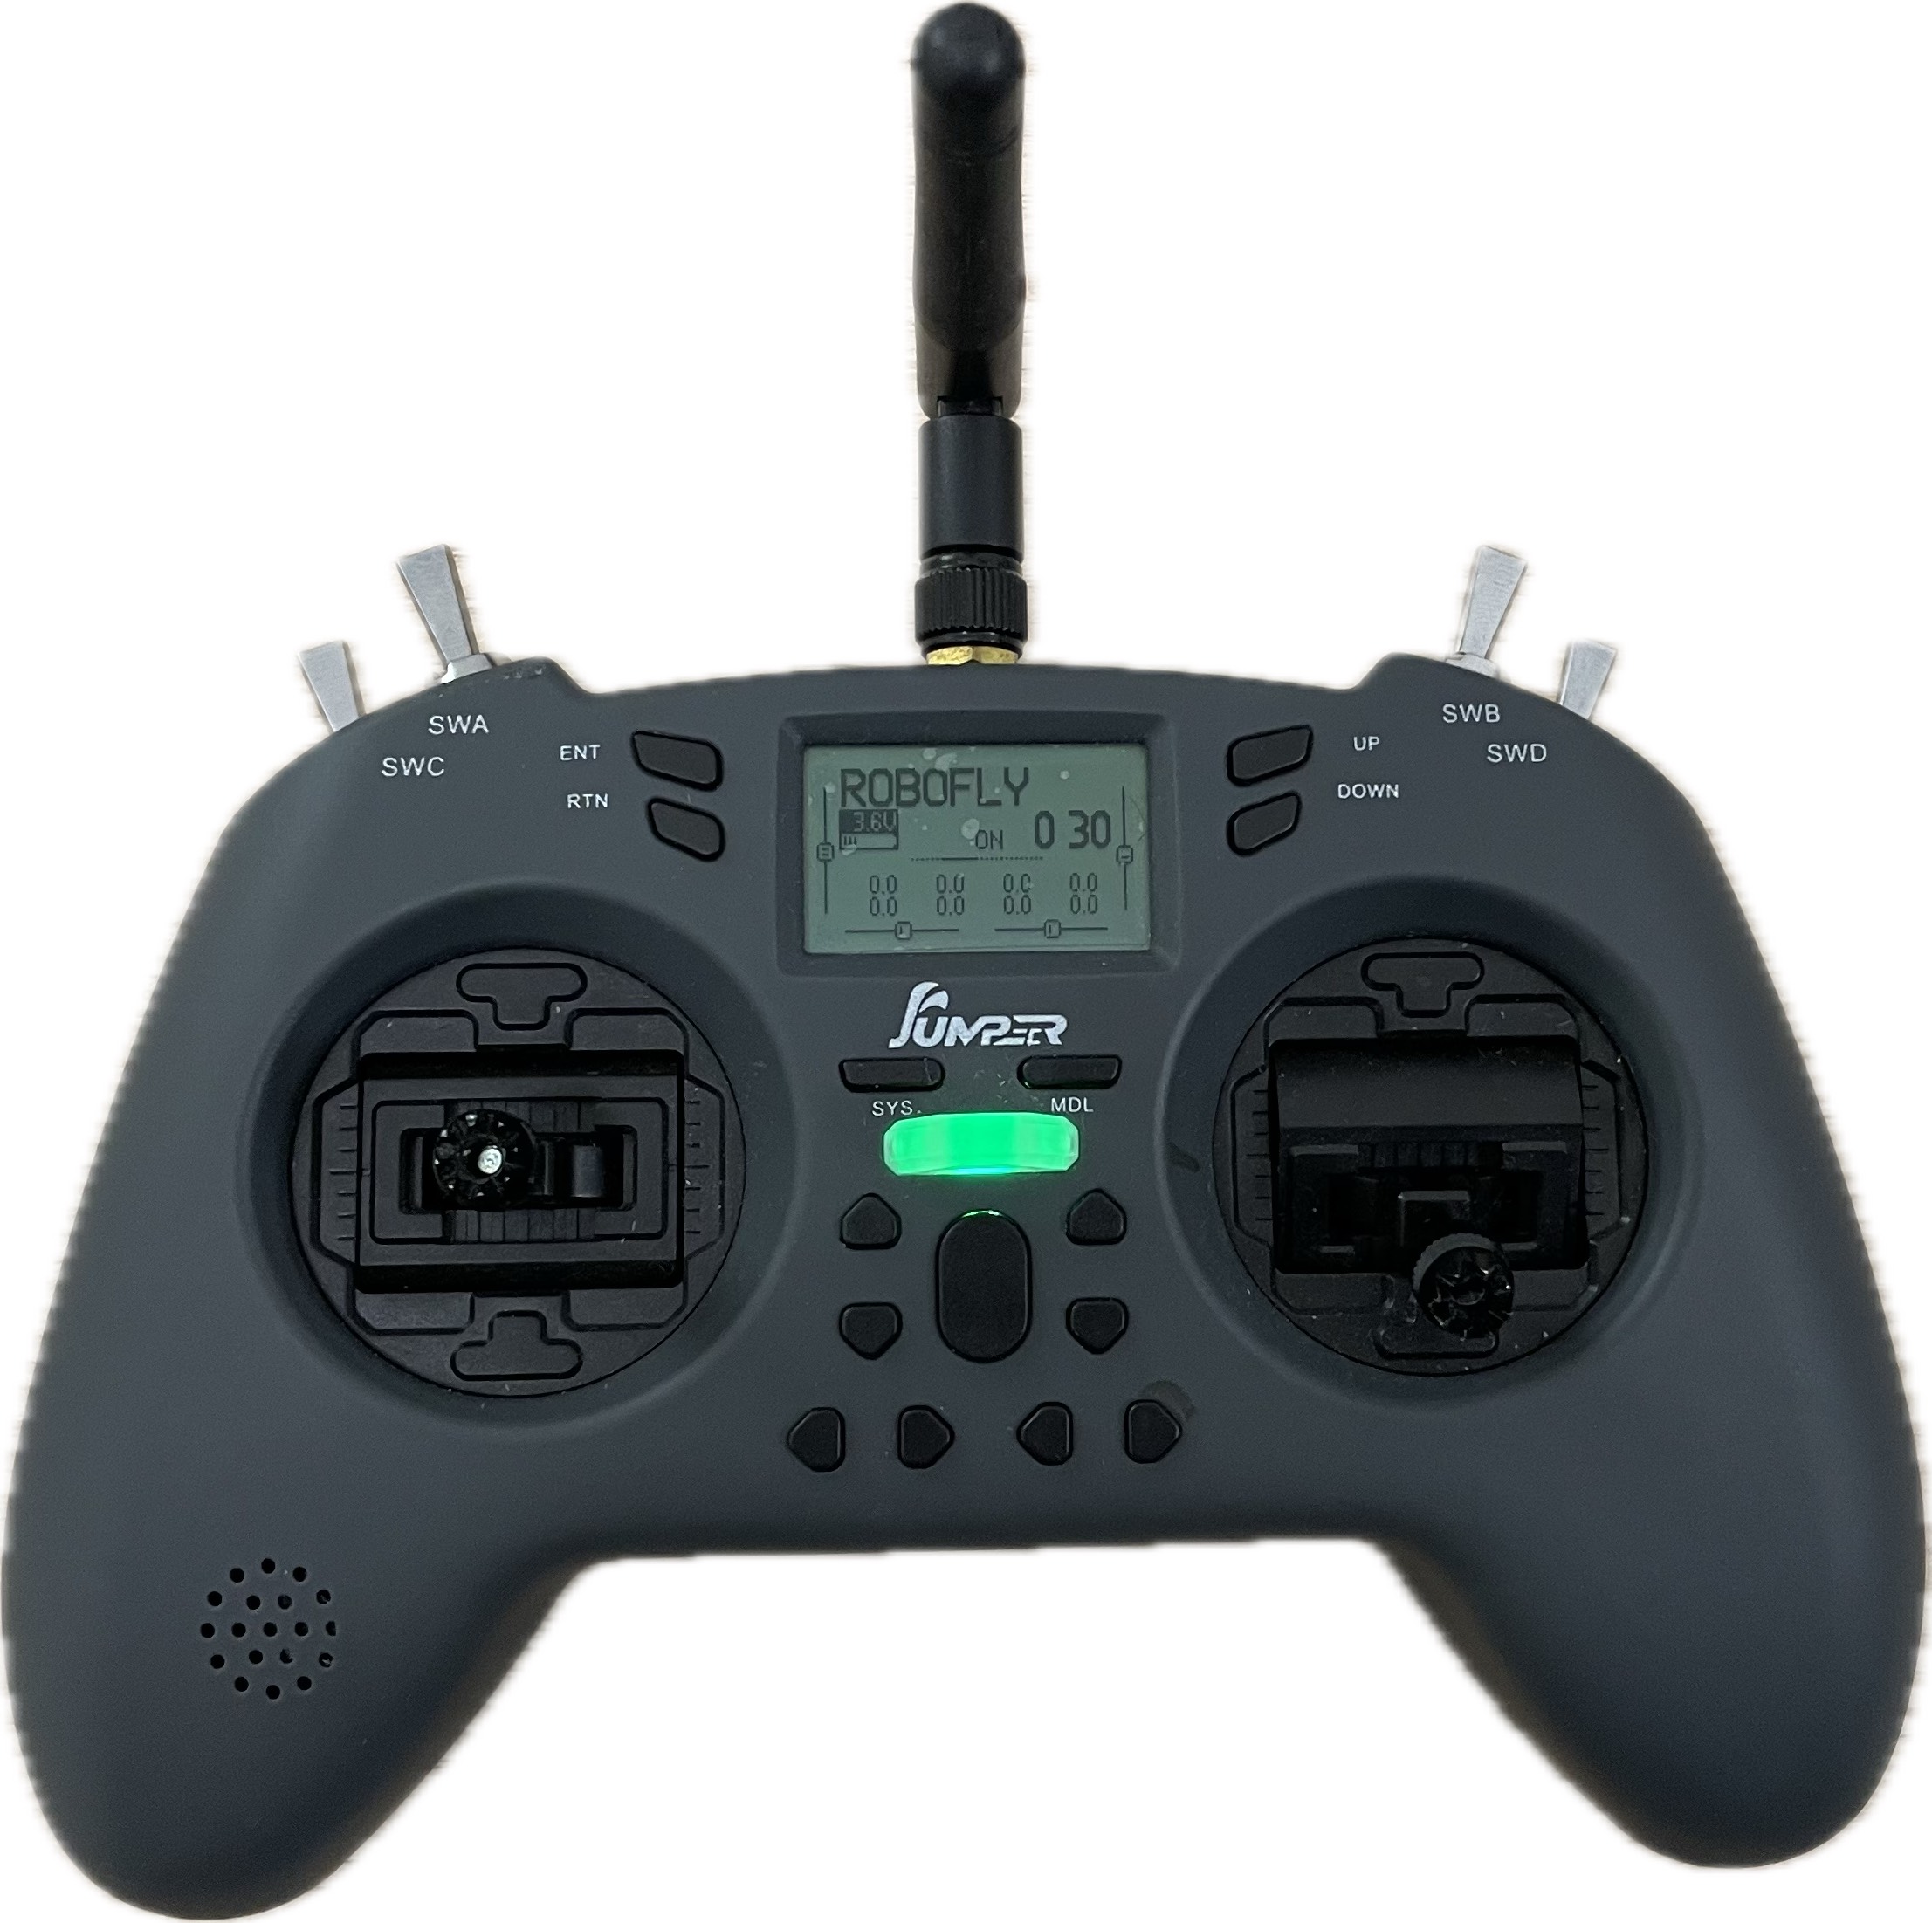
SWA (Offboard Switch)
The SWA is a 3-position switch, with the middle position unassigned. Switching to the upper position (towards you) activates Offboard Mode. In Offboard Mode, RoboFly follows any deployed autonomous session, and stick movements will have no effect.
SWB (Flight Mode Switch)
This 3-position switch selects among three flight modes:
- Stabilized Mode (down): Default mode for manual flight without GPS. The vehicle hovers when no control input is applied but moves with current momentum and drifts due to wind.
- Altitude Mode (middle): Easiest manual mode without GPS. Altitude is maintained, but horizontal movement is subject to momentum and wind.
- Position Mode (up): Requires active GPS. This is the safest manual mode. The vehicle maintains its position in all directions when no control input is applied, even against wind.
SWC (Take-over Switch)
This 2-position switch allows the pilot to temporarily override autonomous sessions to avoid hazards. Flipping it up during flight takes over manual control. Returning to the down position resumes halted sessions.
SWD (Escalating Emergency Switch)
This 2-position switch provides safety actions during emergencies in autonomous flight. Flipping it up halts ongoing sessions and holds the drone’s current position. A second upward flip commands the drone to land immediately.
Arming and Disarming the RoboFly
Arming prepares RoboFly for flight. This involves a gesture with one or both sticks, performed for one second.
Additional RC buttons and switches can be defined for individual purposes. If that is the case, this will be specified where it is relevant.